Easy Pumpkin Patch Painting Activity for Kids
If you’re looking for a fun and easy pumpkin theme art activity for the kids this fall, you’ll love this one.
This post contains affiliate links. As an Amazon affiliate, I earn a small commission on purchases made through these links at no extra cost to you.
This pumpkin patch painting activity is really easy to put together, and you only need a few materials.
Other than gathering your materials, and covering your work surface, there’s no prep work.
The Materials:
· Green & orange washable tempera paint (finger paint)
· Small containers (yogurt cups) to hold paint
· Tablecloth or something to cover your work surface (I’ve linked to a reusable one below.)
· Large sheets of mixed media paper (1 or 2 per child)
· Paintbrushes – (optional)
· Baby wipes or wet washcloth for wiping fingers
This activity can be done as a fingerpainting activity, or kids can use paintbrushes. If using paintbrushes, it’s best to have 2 per child; one for green paint, and one for the orange. If you only have one brush per child, simply rinse the brush before switching colors, just be sure to get as much water out of the bristles as possible.
Below I’ll list the steps we went through when making our pumpkin patch painting. But use the steps as loose guidelines. Kids may have their own idea of what they want to do with the paint. Why not let them unleash their creative juices.
It’s more about exploring art than the final product.
I definitely encourage the adults to get in on the action. You might be surprised how fun it is.
The Setup:
· Cover the work surface with the vinyl tablecloth or other. You don’t really have to stress too much about this since the tempera paint is very washable. (although I don’t know how it does on fabrics and carpets)
· Set out one set of materials per child in their own workspace. (sheet of paper, paint cups, paintbrushes if using)
· Put a small amount of paint in each cup; one green, one orange. I recommend a separate set of paint cups for each child in case a younger child mixes the paint or such. (For toddlers and preschoolers, only give one paint color at a time.)
The Process:
It works best if the adult demonstrates the whole process on their own paper before the kids start.
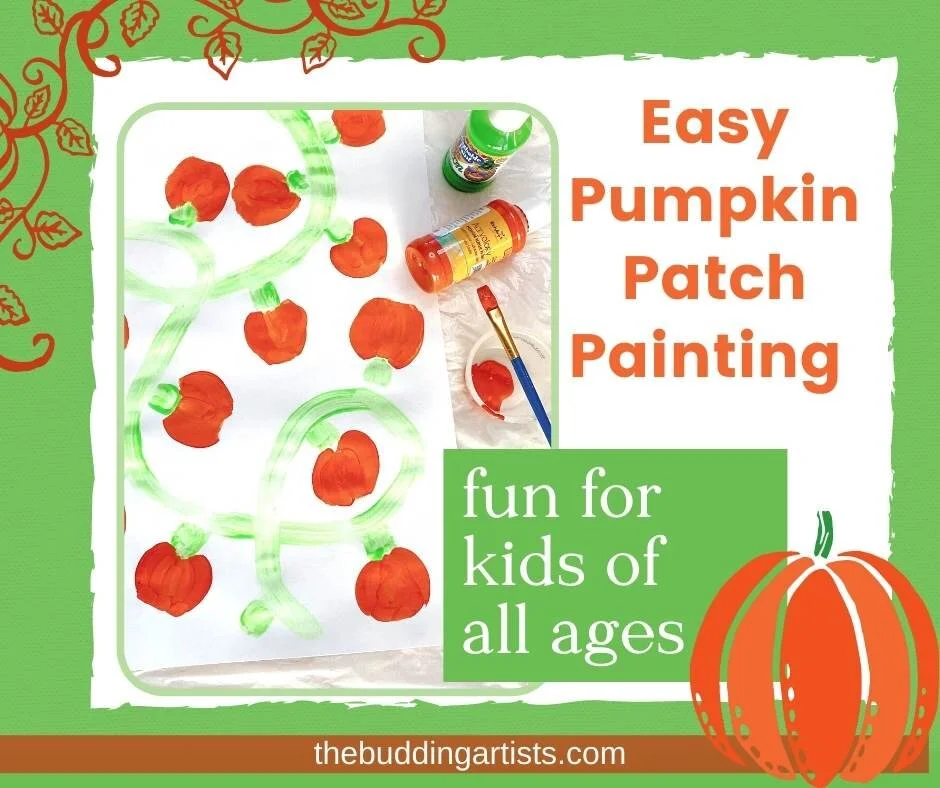
1. Use your index finger or a paintbrush to draw a squiggly line from one end of the paper to the other. This is the vine the pumpkins grow on. (For younger kids, I recommend keeping it this simple. For older kids you can show them how their pumpkin vine can twist and turn across the whole paper. See the pictures for examples.)
2. Next make small green swipes (like little wobbly rectangles) at intervals all along the vine. These will be the stems of the pumpkins. Fit as many as you can on the vine.
3. Now it’s time to switch colors. Wipe the green paint off your fingers (or get a clean paintbrush) to get ready for the orange.
4. Use your thumb or paintbrush to make an orange circle at each green stem along the vine. Older kids can try to paint slightly more realistic pumpkins by painting parentheses first for each pumpkin outline and then filling the parentheses in to form the pumpkin.
5. That’s it. Sign your name on your artwork and let it dry!
Things to know:
· It’s more fun if you keep the mindset that this is about the process and not a perfect final product.
· Sometimes I tell the kids I’m working with that they have to follow my instructions on the first paper, and on the second one, they can paint it the way they want to.
· Kids get on a roll with the paint, and will probably want to do another picture, so be sure to have more paper ready for them.
· Some kids love the feeling of the paint, so this may turn into a whole-hands type of painting activity. Let them just have fun with it as long as they keep it on the paper.
· Don’t be surprised if the younger ones want to just cover their whole paper in paint or start mixing it.
· Green and orange mixed together makes brown.
Be sure to save this for later. The image below is pinnable. Thanks!
You might also like:


